
TRAVIS PICKING
TRAVIS PICKING IN G
Learn Travis Picking in G with a set of step-by-step exercises that build a solid technique.
TRAVIS PICKING IN G
Fingerpicking in the key of G
This lesson series will build up to a complete bass and melody pattern of Travis Picking based in the chord/key of G.
We begin with building up from the very basics - so this lesson is ideal for a complete beginner. This lesson will show you some alternate bass and features exercises that build in musical complexity - but more importantly strengthen your fingers and timing for these fingerpicking pieces
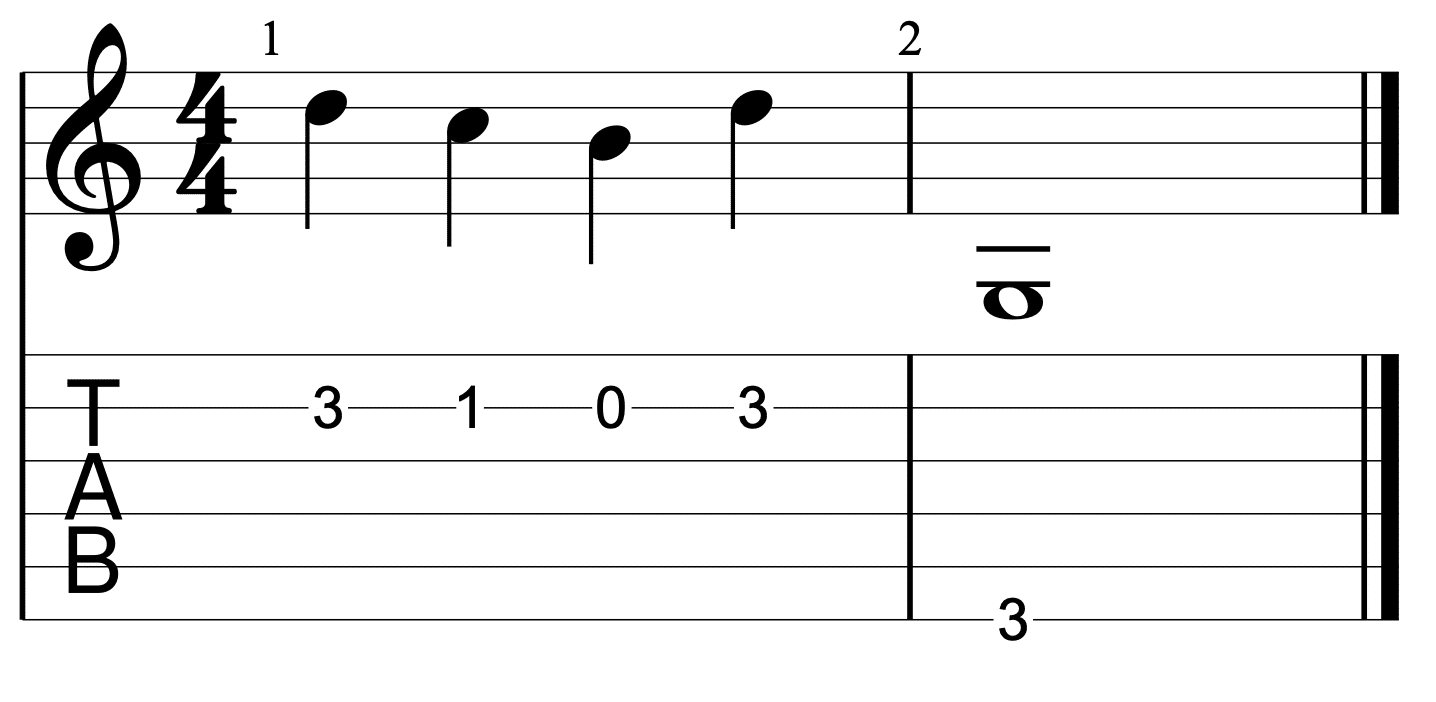
NOTES & FINGERING
LEFT HAND FINGERING
It is vital that you use the appropriate fingers of the left hand (fretting hand) which go as follows:
- the bass note is fingered with the 3rd finger of the left hand (the ring finger) and plays the 6th string (thickest string) at the 3rd fret
- there are then 3 notes on the B string (the second thinnest string) at the 3rd fret (played with the pinky of the left hand)
- the 1st fret of the B string played with the index finger of the left hand
- and the open B string which isn't fretted at all (obviously!)
I can tell you this honestly - if your left hand fingering isn't correct, then you won't master these exercises. Play exercise 1 slowly and ensure you are using the right fingering - because these aren't the same fingers you use to usually fret the G chord. Our goal here is to keep that bass note down in a way that lets us play those 3 melody notes (which are a part of the G major scale)
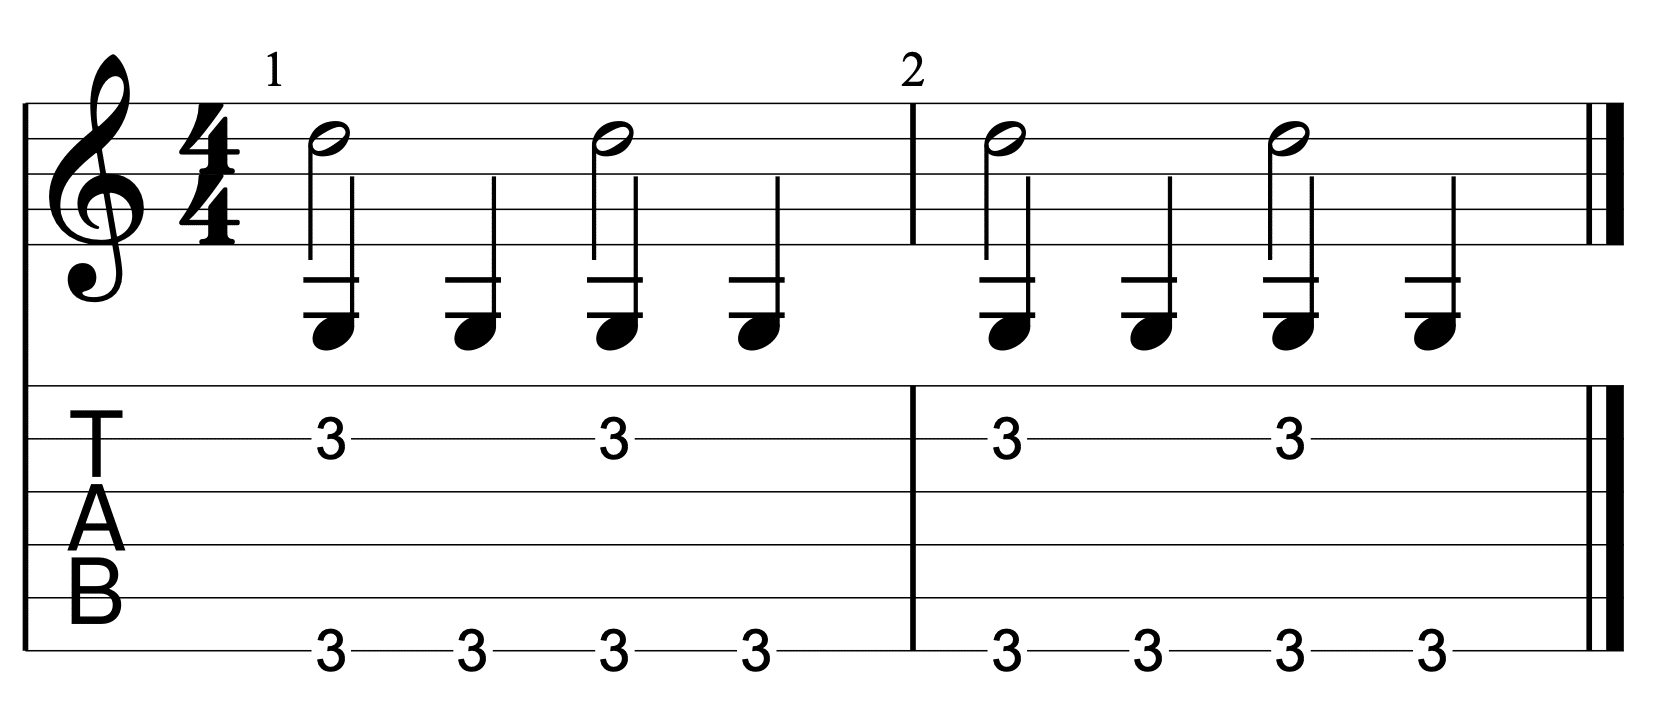
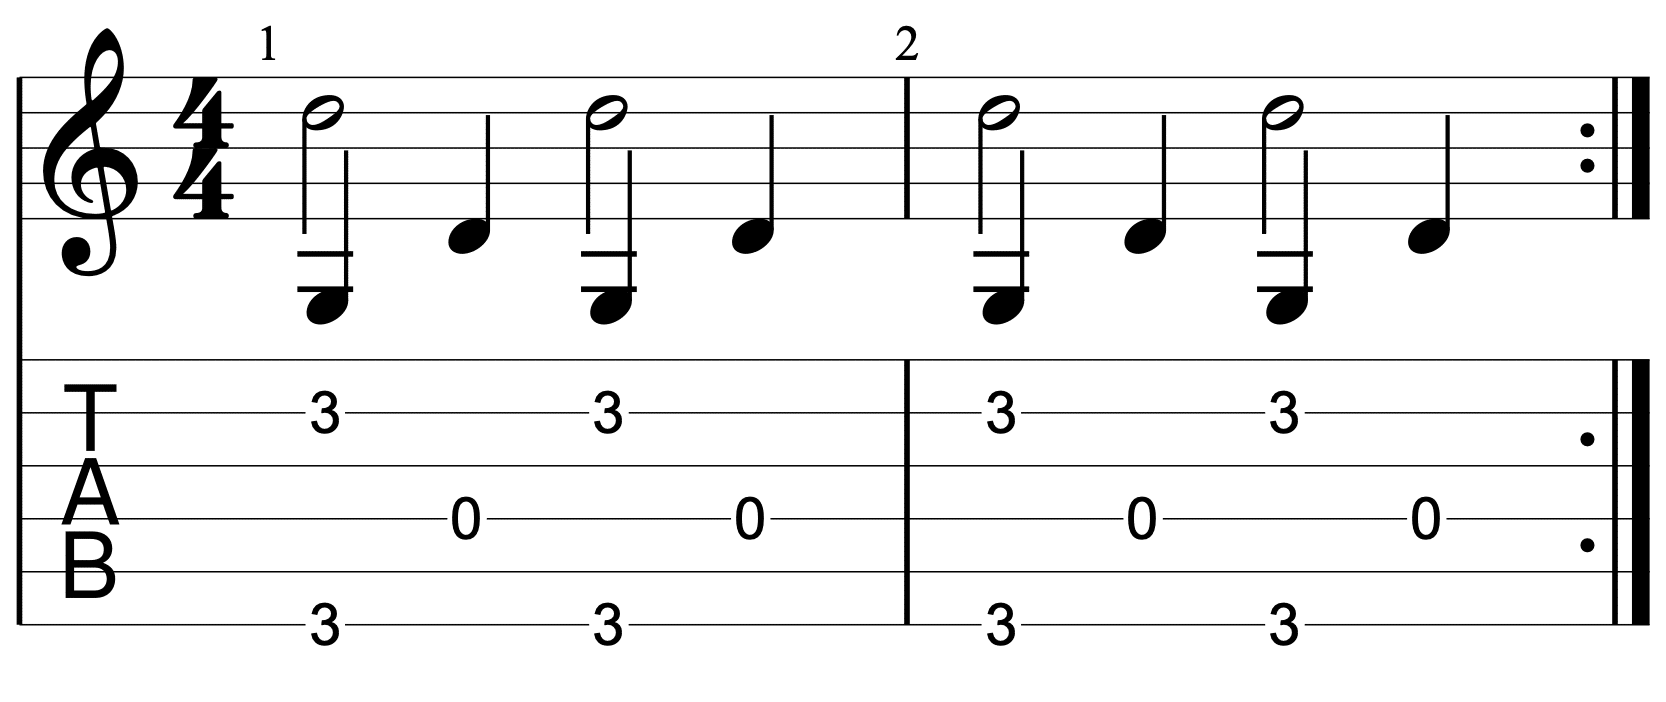
Exercise 2 - Steady bass With pinch
In exercise 2, we have a steady bass. We play the bass note at each beat of the bar 1-2-3-4.
Your mind should think of this steady regular bass note as the constant - to which we add a few melody notes.
Here we play the B string at the 3rd fret (using the pinky of the left hand!) on beats 1 and 3.
Playing a bass note and melody note at the same time is called a "pinch" - this is because the thumb plays downwards and the melody note on the B string is plucked upwards, creating a pinch type of motion.
So you want to play 4 steady bass notes and pinch on 1 and 3!
EXERCISE 2 - STEADY BASS WITH PINCH
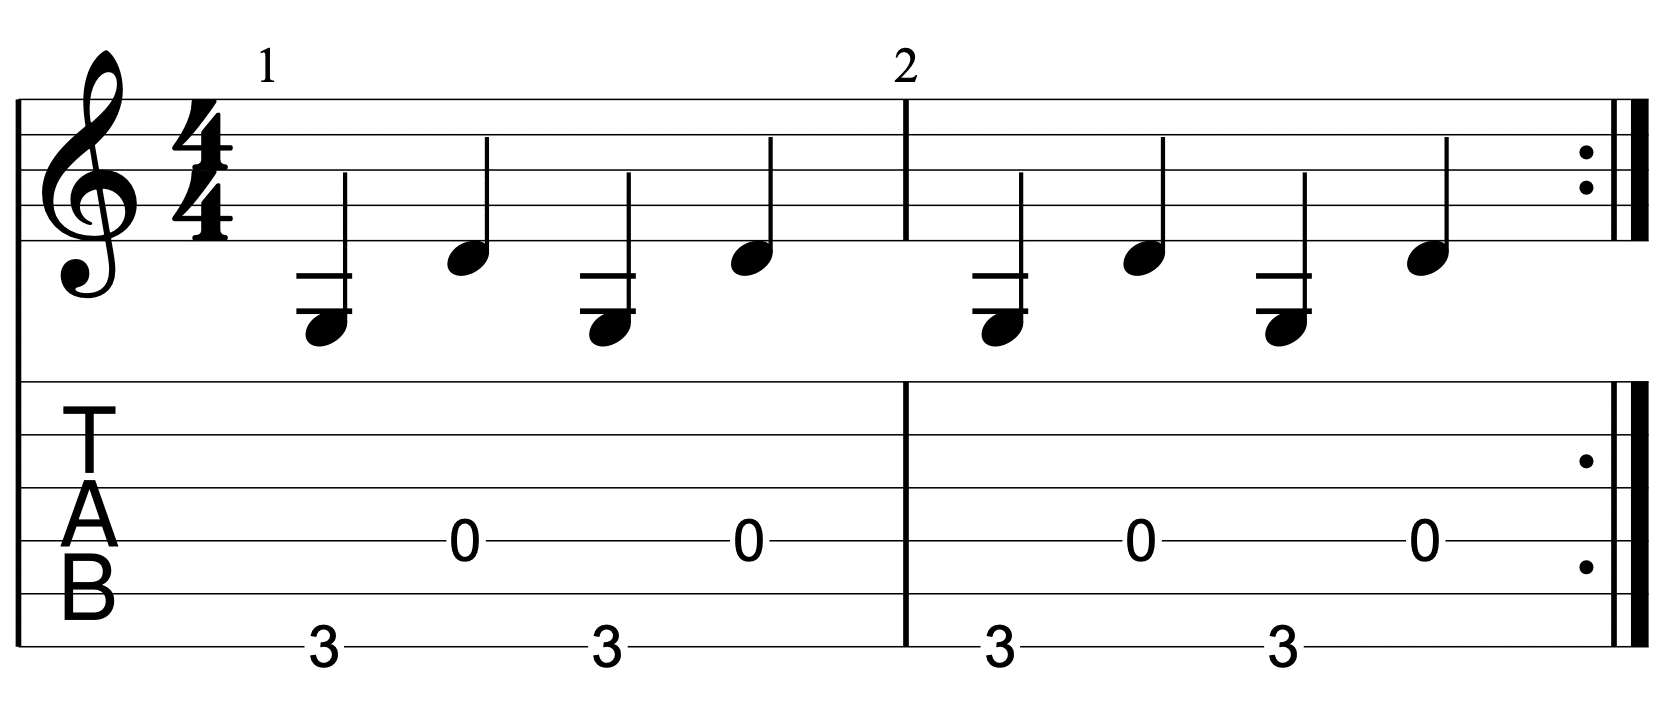
Exercise 3 - Alternate Bass
This entire exercise is played with the thumb.
The idea of the bass playing alternate notes is perhaps the fundamental skill of fingerpicking. If you were to spend an hour practicing this alone, it would be time super well spent. Maybe dedicated 2 or 3 minutes to practising this exercise every time you pick up your guitar for a while.
This is a mechanical movement - like learning to ice skate, rollerblade or ride a bike. It will come. When you start off, the thumb may hit the wrong strings or get a bit lost. This is fine. Over time, you will alternate between the E (thickest) string and D (4th) string easily and without error.
Alternate Bass in G
Exercise 4 - Alternate Bass with Pinch
This exercise is a mix of exercise 2 and exercise 3. You play exercise 3 and add a pinch on beats 1 and 3.
As you add this, you may find that your previously reliable alternate string playing with the thumb falls apart! But don't worry, it will soon recover!
Alternate Bass With Pinch
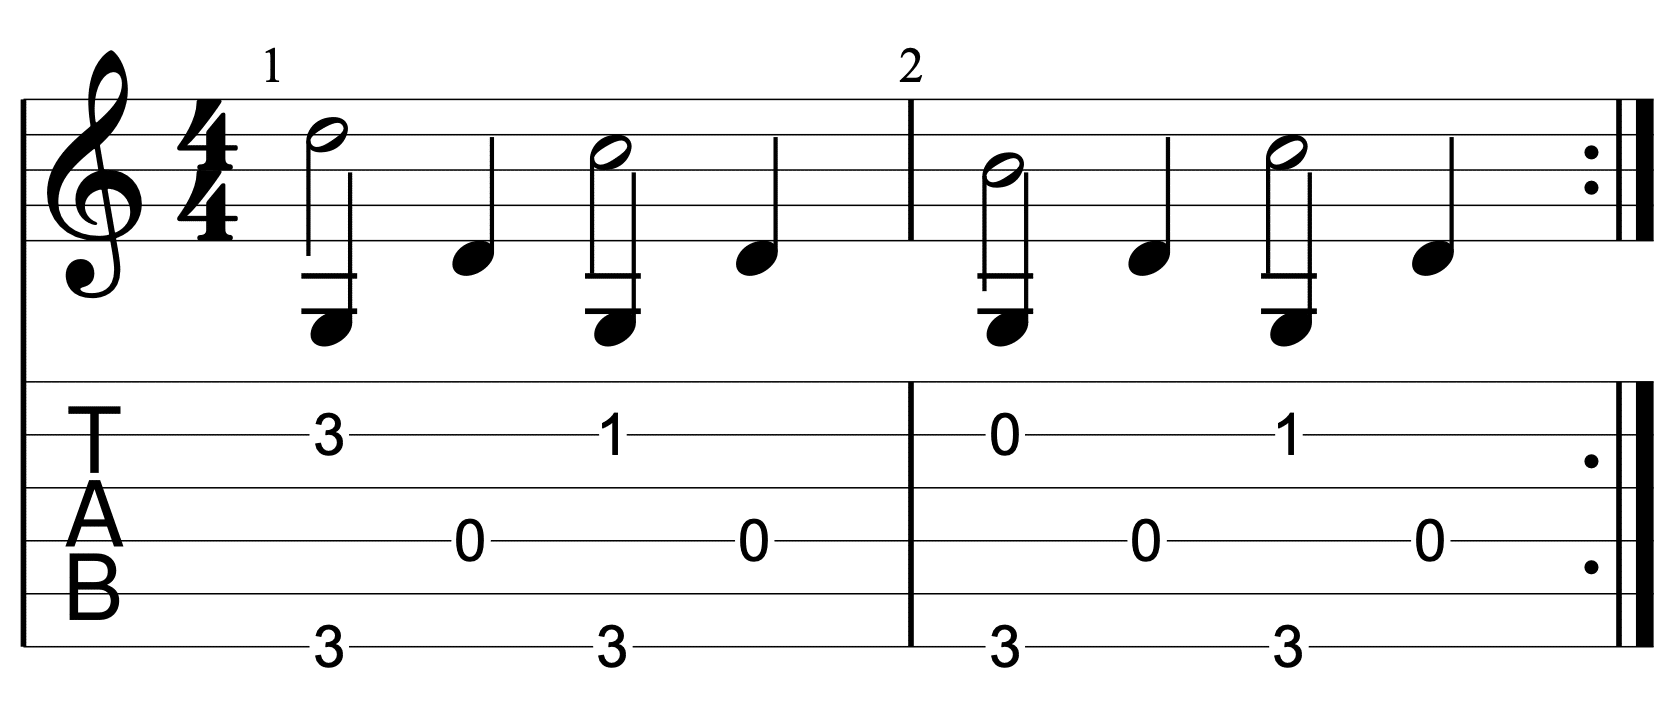
Exercise 5 - Pinching a simple melody
This exercise is a simple "alternate bass with pinch" exercise - yet we change the melody note that we pinch.
The best way to visualize this is:
- the first pinch and then the D string bass
- the second pinch and then the D string bass
- the third pinch and then the D string bass
- that second pinch again with the D string bass
If this seems hard, just practice bar 1 for a while (the first half of the exercise below)
Pinching a simple Melody
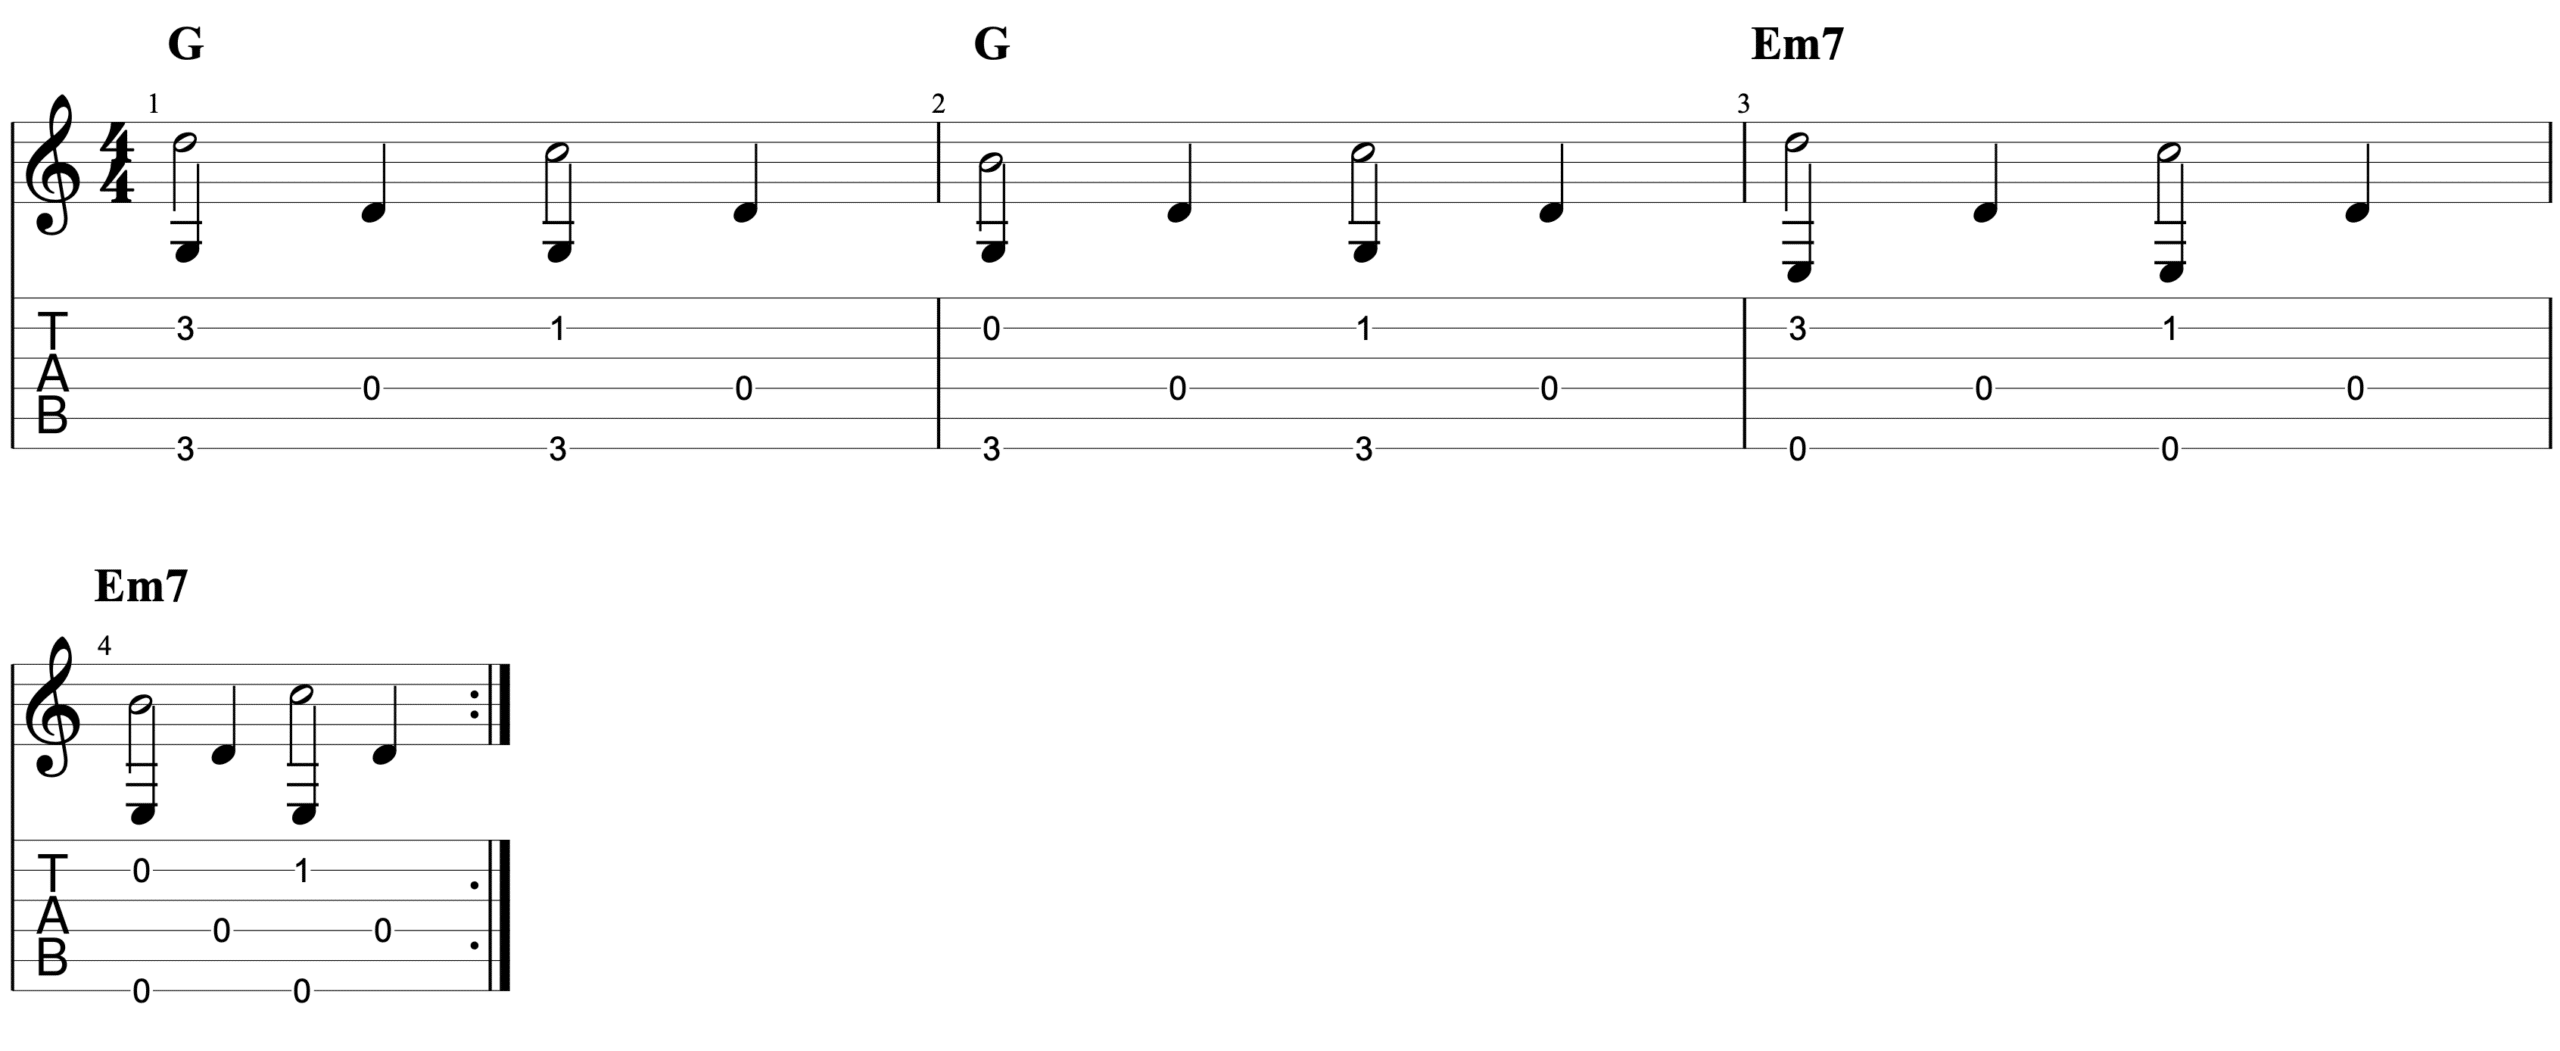
Exercise 6 - Pinching a simple melody over 2 chords
If you can play exercise 5, then you already have the first 2 bars of exercise 6 - they are identical.
Then rather than having the 6th (thickest) string at the 3rd fret, we leave that string open. That's the only difference between the first 2 and subsequent 2 bars.
You will notice that this adds a lot of "musicality" to the piece. It would now sound like a piece of music rather than a practice exercise. What great progress you have made!
Pinching a simple melody over 2 chords
Please share this article with your followers using the buttons below
GET A COURSE - LEARN FASTER!

Did you like the level of this lesson (how hard/easy it was)?
- This course is perfect for you!
- Structured learning of 30 lessons you can do in 15 minutes per day
- Full course only $29