
Practice Tips
Perfect Right-Hand Fingerpicking Technique
Achieve comfortable playing, avoid pain and injury with this guide to right-hand technique
This guide helps the beginner fingerstyle or fingerpicking guitar player to analyze their right-hand fingerpicking technique – particularly for posture that helps achieve comfortable playing, builds speed and avoids future pain in the wrist or arm.
Note that I have a companion article for left hand fingerpicking technique that you should also check out.
For the right-hand technique, there are 3 important elements to consider
- resting finger position
- anchoring the forearm
- perpendicular fingers
Resting Finger Position
The “Big Rule” of fingerpicking is that each of the three fingers plays one string and the thumb plays any notes on the 3 bass (thickest) strings.
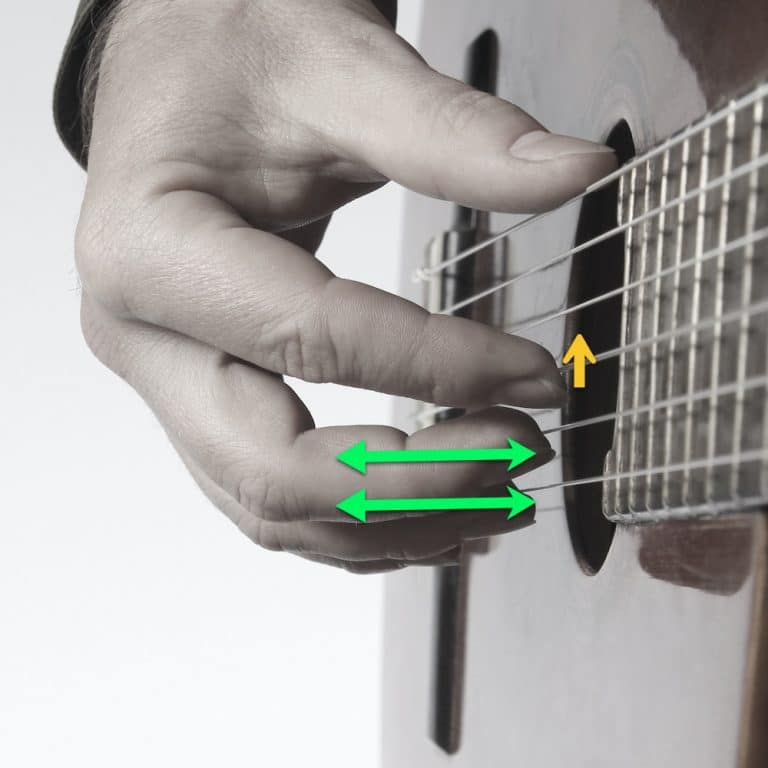
Specifically, the core aspect of perfect right-hand fingerpicking technique is this assignment of finger to string. The best way to think about this is that each finger will rest above its associated string when not playing it.
- the index finger rests above the 3rd string (G string)
- the middle finger rests above the 2nd string (B string)
- the ring finger rests above the 1st string (thin E string)

Anchor your forearm
If you want your fingers to hover nicely over the appropriate strings, then you need the right arm to have sufficient support.
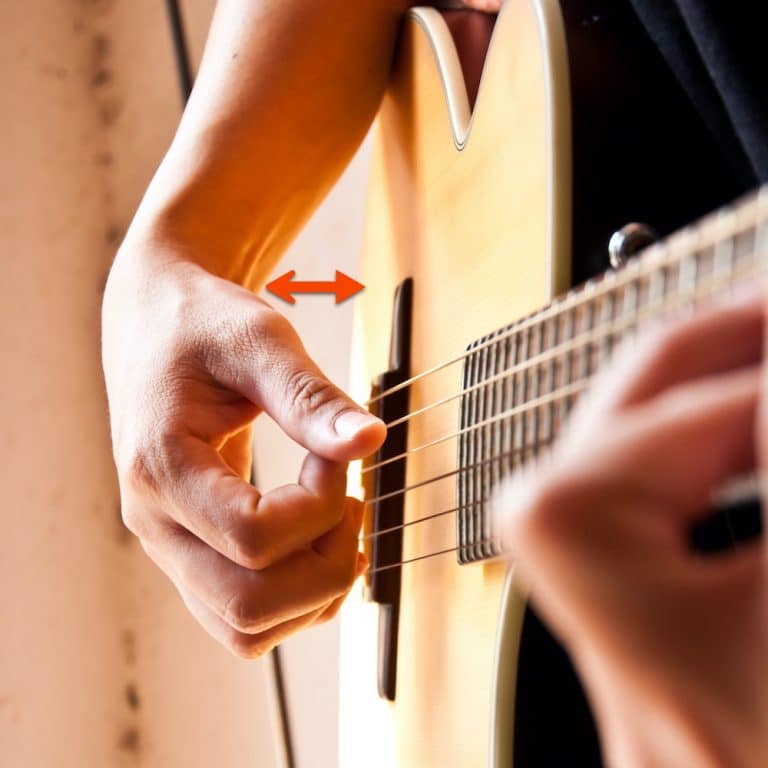
We achieve this support by anchoring the right forearm to the body of the guitar. Look at the red arrow in the image below. The forearm is in contact with the guitar body – meaning that it is touching off the guitar and holding the guitar in place too (so it doesn’t wobble around)

Note that you want to keep the wrist of the right-hand relatively straight.
In the image below, the player is anchoring the guitar in place (so it won’t wobble around). However, it won’t be easy for this guitarist to keep those fingers hovering and to play each string. There is too much distance from the wrist to the actual guitar (the red arrow below). Watch out for this – there should be some gap but much less than you see here. The mistake this guitarist is making is not keeping that right-hand wrist (relatively) straight
Perpendicular Fingers
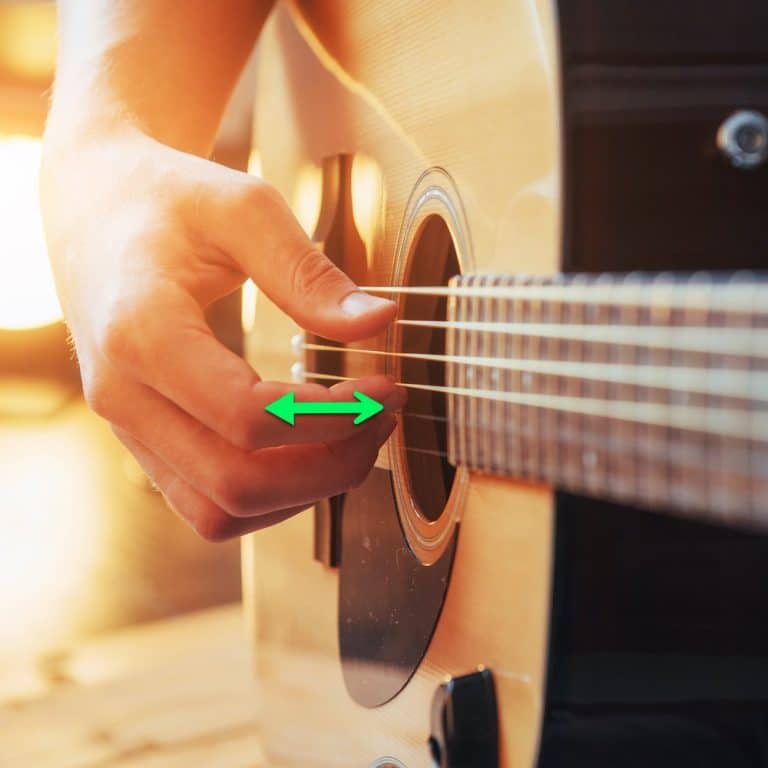
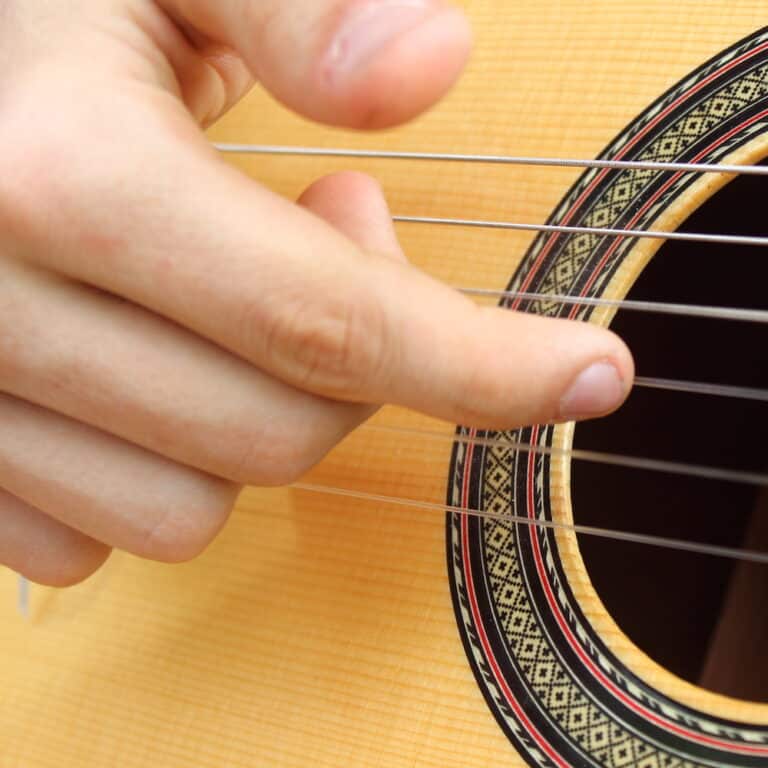
It’s important that your right-hand fingers are perpendicular to the strings for optimal note plucking and recovery to rest position. The image below is a great example. Each of the 3 fingers should be perpendicular. This will make it easy for you to play notes and will in time contribute to fingerpicking really quickly if you want to.
If you need a correction, then consider moving the whole arm up a bit or down a bit (i.e. moving your right elbow so that you can comfortably achieve this position with a straight right wrist). As a beginner, it might take some adjustments but even just being conscious of what good looks like will get you to the right place.
Watch out also that your fingers stay (roughly) perpendicular when not playing a note.
Mistakes to watch out for!
I will list below three of the most common mistakes that I see in my students right-hand technique.
The image below shows fingers which are not perpendicular to the strings. When the fingers are lower than the strings, it’s impossible to play a string and get back quickly to the perfect resting position.

In this image below, the player is resting his right-hand pinky. I have seen some players play very well with a rested pinky. It’s not really a blocker to playing well but it’s not helpful. You will become reliant on having this pinky rested – and that will hurt you in the long term. So do not rest the pinky or any other fingers. Rather, develop the strength in your fingers and get used to no anchored fingers.
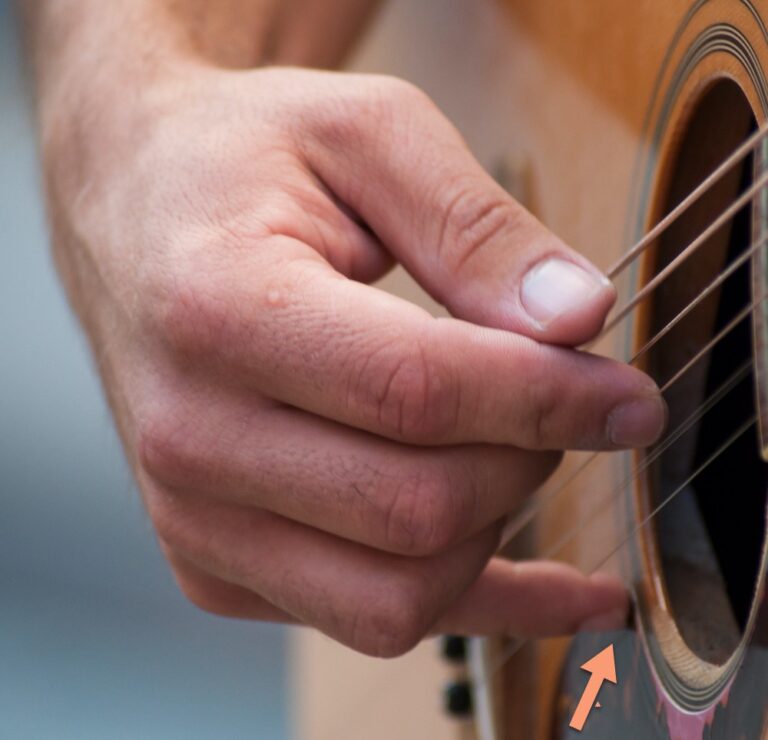
In the image below, the player is plucking a string but the other fingers have completely lost their resting position. They are not hovering over the other strings and as a result, playing the next note will be hampered. Certainly, this player will never develop real fingerpicking speed unless they can correct this.
Please share this article with your followers using the buttons below
summary
If. you focus on the key aspects, you can get the perfect right-hand technique. Take it slowly at first and if you feel any pain during your corrections, always stop and take a 5 minute break.
Focus on:
- resting position
- anchoring your right-arm to the guitar body
- keeping fingers perpendicular to the strings
If you want to email me a video of your posture at patrick AT learnfingerpicking.com, I will take a quick look!
Good Luck!
p.s. you should also check out my companion article for left hand fingerpicking technique.
Get the Learn Fingerpicking Book
Register for the newsletter and I will send you this book (105 pages) and a free lesson once a month.
This is the ideal resource for complete beginners who wish to learn guitar.
